Associated tools
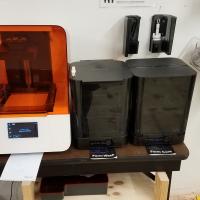
FormLabs 3B Badge
Badge Checkout Requirement
In person checkout required
Badge Checklist
Complete these items to earn the badge.
- FormLabs 3B Checklist
- Video watched, quiz taken, any questions?
- Identify and describe control axes, changing material/platform/tray
- Have member describe each step, making sure they mention each point. Actually perform bolded points.
- Changing resin
- Close air cap on material canister
- Remove canister and put on appropriate shelf
- Remove tray and put in case on appropriate shelf
- Remove build platform and put on appropriate shelf
- Replace with desired material, platform, and tray
- Working with PreForm
- Go to PreForm on the computer next to the printers (or download to your own computer), and connect to the Form 3b at MakeHaven called “DirectKudu” (it’s a unique name like a serial number)
- Go to File and Open, select your STL
- Using the slicer controls:
- Rotate
- Scale
- Remove single
- Remove multiple
- Duplicate
- After orienting model in slicer, select support button, and add supports and raft (select Auto-Generate All if unsure)
- Click “Magic Wand” button on left if you want the computer to prepare everything for you (One Click Print)
- Upload and print
- Don’t forget to loosen cap on canister to let air in!
- Removing material from platform
- Lift the lever of the platform on the printer to remove the platform.
- Close lid promptly.
- Wash cycle
- Raise the basket of the wash bin by clicking on the scroll wheel menu of the wash bin. Put platform (same orientation as in printer) into the wash bin and start wash cycle.
- Soak in wash bin
- After wash cycle, raise basket and inspect print. If needed, remove parts from print platform using pry tool or spatula. Use side-snips to remove remaining support material from part.
- Close lid of wash bin promptly.
- Let dry for 30 minutes
- Cure cycle
- Open cure chamber and put part on platform. Start cure cycle.
- Pay for Print Material
- Keep note of the “Details” pane on the right of PreForm after preparing your sliced file. Either through the MakeHaven store online or in the cash box next to the printer station, please pay for the material used in your print according to the prices listed on the shelf of material currently being used.
- Feel free to talk about the following:
- Machine levelling
- Location of extra IPA (flame cabinet in woodshop)
- Check for IPA health using floating gage
- If you experience problems that you cannot fix while printing, replace the green check mark with a red X. If able, leave a note on the whiteboard of the problem, and post on Slack
- Write on the clipboard by the 48hr table if more resin is needed