Step 1. Get Materials
There are many options for plywood but your best bet is to purchase 1/4 inch thickness and 12 by 12 inch hobby board from Artist and Craftsman. If you can't get that board size, get another and you can adjust your box proportions.
[[{"type":"media","view_mode":"media_large","fid":"980","field_deltas":{"1":{}},"fields":{},"attributes":{"height":"270","width":"480","class":"media-image media-element file-media-large","data-delta":"1"}}]]
Step 2. Generate a design.
There are many resources out there for generating box designs (see Other Resources), but we are going to use http://www.makercase.com/
Choose a box width of 4, height of 5.5 and depth of 3.25. The result should fit nicely in the 12 by 12 inch plywood. You might play with these numbers to get a different sized box but remember it needs to fit on the material you have.
Next, choose the joint type (Finger is Recommended) and set the material thickness to 1/4 inch. You can set the tab width how you like.
[[{"type":"media","view_mode":"media_large","fid":"971","field_deltas":{"2":{}},"fields":{},"attributes":{"style":"font-size: 13.008px; line-height: 20.0063px; width: 307px; height: 380px;","class":"media-image media-element file-media-large","data-delta":"2"}}]]
Step 3. Decorate the box.
Once you have the basic shape designed it is time to import it into Inkscape and add text or other designs.
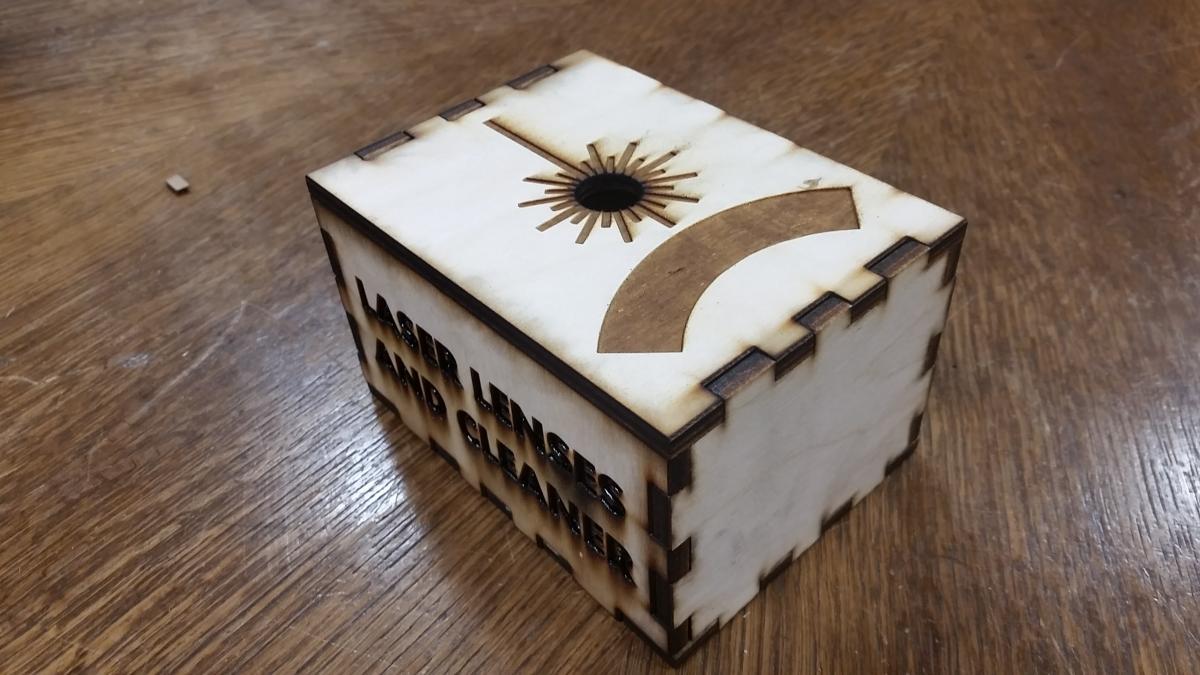
Import the box design, then add text and other images. In my example, I created a storage box for laser lens cleaning supplies. I added a laser graphic and text.
A resource for clipart is http://openclipart.org
[[{"type":"media","view_mode":"media_large","fid":"975","field_deltas":{"3":{}},"fields":{},"attributes":{"height":"270","width":"480","class":"media-image media-element file-media-large","data-delta":"3"}}]]
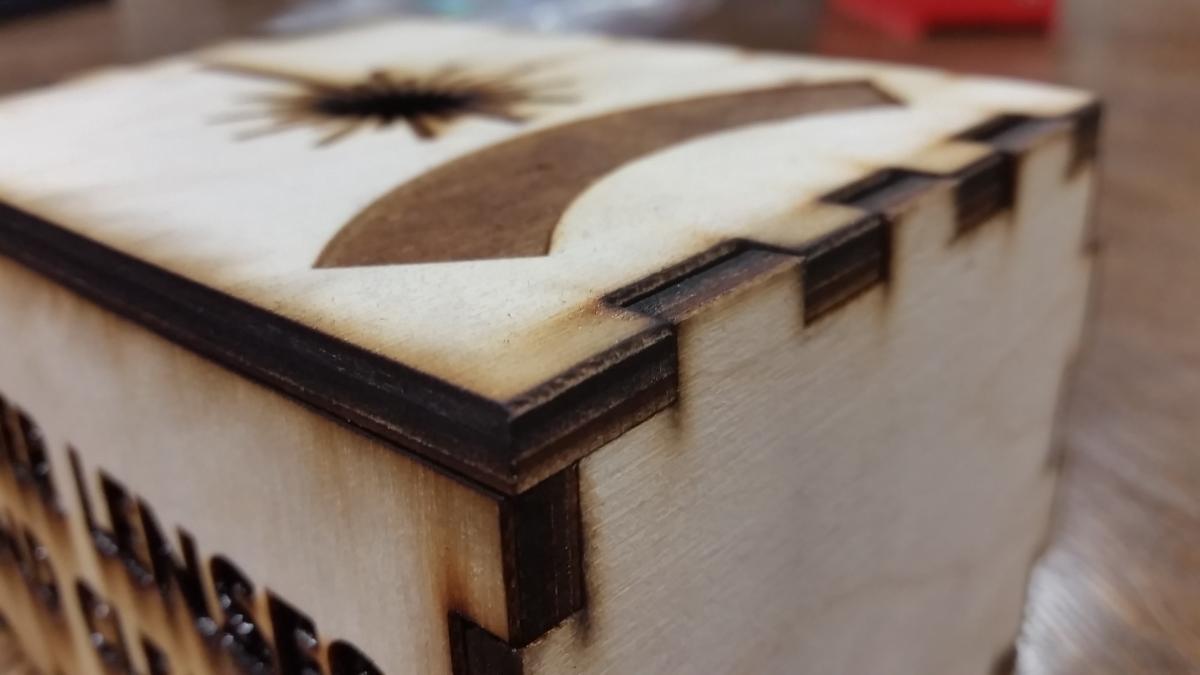
I removed some of the teeth on the lid and the sides that touch the lid so that it would be easier to take on and off.
Step 4. Laser Cut the Box.
I chose to do the raster images first so that the engraving would not be impacted if the wood shifted as the vector cut completed. When cutting the raster I temporarily removed the box pattern so that the laser just focused on the area I wanted engraved rather than drawing the outlines of the pattern. I used the Extensions>Export>Win 32 Vector option and set the black to print as raster. I found that power 50% and speed 30% with ppi of 250 gave me a look I was happy with.
Next I did the vector cut. First I converted the pattern I imported to a Path using the Object to Path tool. I made sure my lines were black, and at stroke width of .001px. I filled them with a color so it was easy to see where my shapes were (the vector print ignores the fill). I removed the stroke on the designs that I did not want to cut and added a finger hole to the lid.
There is much more information about laser cutting on the equipment and badge pages.
[[{"type":"media","view_mode":"media_large","fid":"976","field_deltas":{"4":{}},"fields":{},"attributes":{"height":"270","width":"480","class":"media-image media-element file-media-large","data-delta":"4"}}]]
I found that my vector cut took four passes at 75% power, 5% speed and 250 ppi. I made sure that the pieces were free before moving the surrounding wood. There were still a few teeth that were stuck due to inconsistencies in the wood. I used an exacto knife to remove those.
[[{"type":"media","view_mode":"media_large","fid":"977","field_deltas":{"5":{}},"fields":{},"attributes":{"height":"270","width":"480","class":"media-image media-element file-media-large","data-delta":"5"}}]]
Step 5. Assemble the Box.
Use wood glue only on the inside of the teeth. Remember not to glue the lid down.
[[{"type":"media","view_mode":"media_large","fid":"978","field_deltas":{"6":{}},"fields":{},"attributes":{"height":"270","width":"480","class":"media-image media-element file-media-large","data-delta":"6"}}]]
Use clamps to hold the pieces together.
[[{"type":"media","view_mode":"media_large","fid":"979","field_deltas":{"7":{}},"fields":{},"attributes":{"height":"270","width":"480","class":"media-image media-element file-media-large","data-delta":"7"}}]]
Wait until the glue dries.
Congratulations, you're done! Post your finished product to Slack.
Other Resources
Box Generators
- Web based generators
- Parametric Model
- Script Generator
- Draw it yourself