It all started with an innocent Slack post from Paul Novaks (@novakps -- blame credit where credit is due): "This should be at 770 Chapel", linking to a video of hopscotch on a city sidwalk. A little bit of chatter with @BenBerkowitz and the ball started rolling.
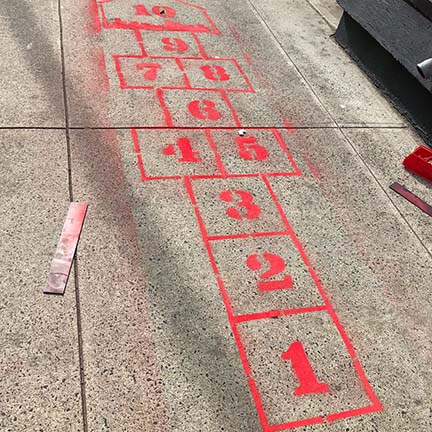
And now we have a (mostly) short-term pair of hopscotch boards chalked on the sidewalk in front of the building.
My files were layed out in Adobe Illustrator CC. (Note: if using the more recent versions of AI, files for the vinly cutter need to be exported into legacy versions of an .eps file -- the default .eps export from Illustrator CC may not open in the vinyl plotter software, but legacy versions open easily and yield a really clean set of cuts. Likewise, files from Inkscape will give you a clean cut if saved/opened as an .eps file rather than as an image copied from the workspace.)
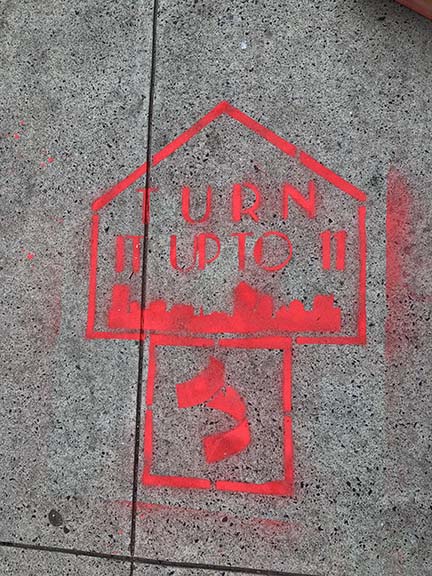
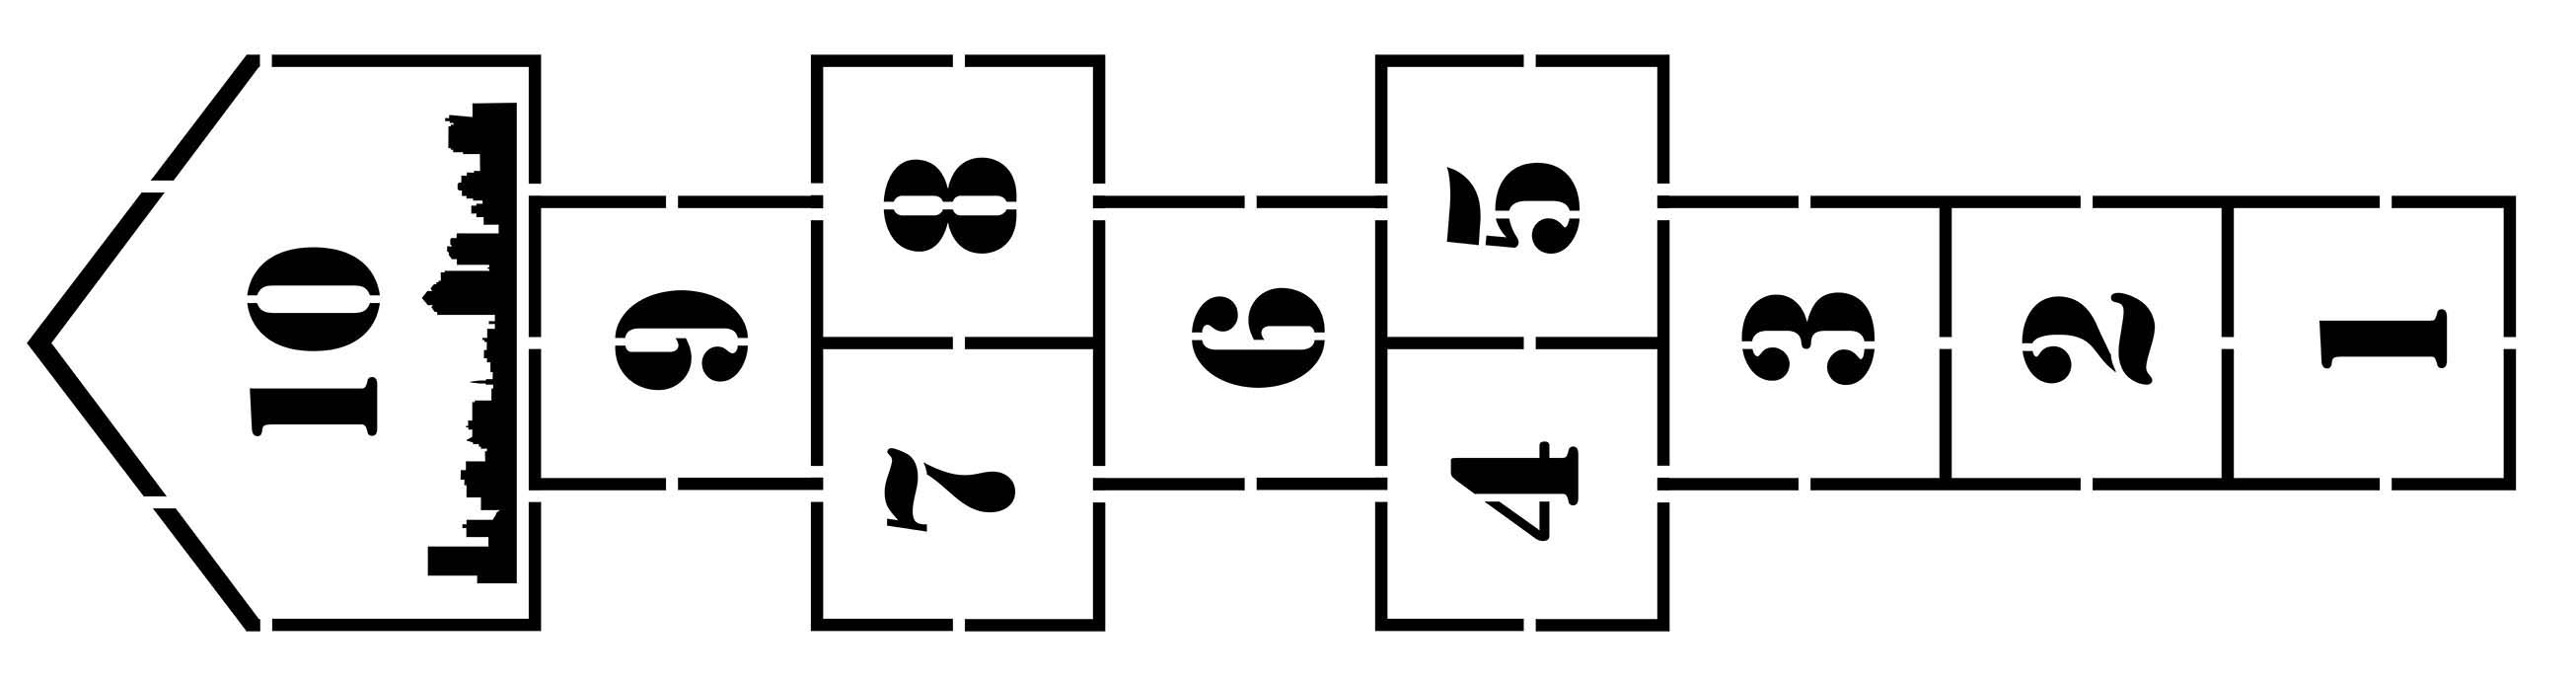
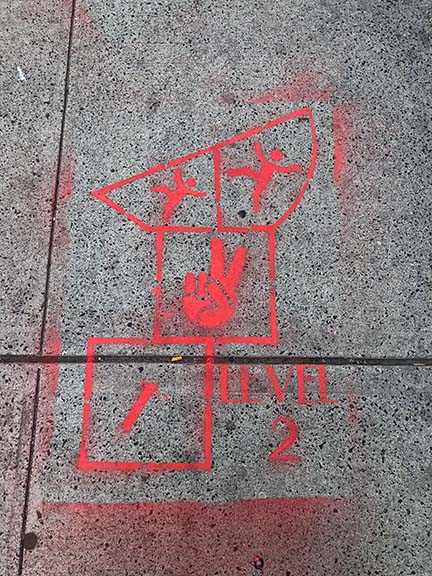
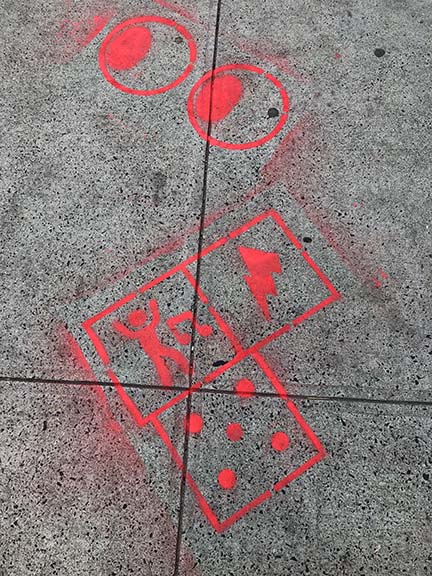
I started with the basic hopscotch board, working with a basic rule of thumb that every piece needed at least two points of support, or more for larger areas or those supporting other pieces. The numbering was in a free stencil font found online, and the city skyline was hand-traced off to allow for a bit of modification and simplification along the way. The crazy board was created with a combination of hand-drawn elements and icons pulled from The Noun Project. The idea was to replace most of the numbers with a related image, an icon that might suggest a more playful approach to the game (e.g., the dancer, the twisting arrow), or just something fun (e.g., the two eyeballs that replaced a pair of the squares). I segmented it into pieces, thinking we could go with a less linear layout on the sidewalk if desired. As it turned out, this was helpful during the cutting process since the smaller sections also made managing the material simpler, with far less material to shepherd.
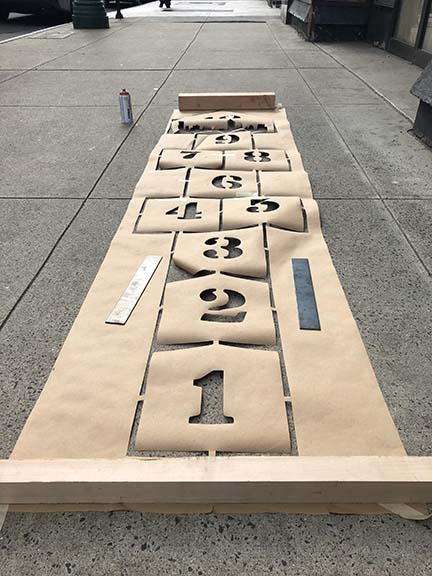
The stencil was cut from the heavy brown craft paper that is usually used to cover the tables for events -- the initial plan was to replace the plotter blade with the pen insert, which I would then cut with an xacto. On a whim, I tested a cut with the blade first, and it worked far better than expected, so I ultimately cut the whole 10' board in a single pass. In fact, it only took about the same cutting pressure as sign vinyl.
Prior to plotting, the craft paper needed to be trimmed to width, as the raw roll is several inches wider than the plotter; I cut it down 3' at a time using a straight edge and a utility knife to provide a 28" edge. I wasn't thinking about which edge to trim at the time, but realize in hindsight that it would have been easier to align the material on the bed if I had cut down the edge running on the left side of the plotting area. When cutting 10' of material, even barely-angled feed will cause big problems as the cut proceeds.
The actual cut required a huge amount of babysitting, as the craft paper obviously doesn't have any backing paper, and is also prone to curling after sitting on the roll for months. This combination of factors meant that a lot of the smaller unsupported areas wanted to get pulled under the rollers. Ultimately, I worked around this issue by keeping as much of the sheet as level as possible as it fed in and out of the plotter. A few areas still got pulled under; on the 10' stencil, these areas were patchable with masking tape. The second stencil, which was far more ornate, ultimately ended up with several sections that had to be cut two or three times after large sections were eaten alive.
After cutting, the stencils were layed flat on the floor and weighted for several days to flatten out some of the residual curling. This was only marginally effective. Ironing the paper (maybe with a bit of steam?) has since been suggested as a solution, and I will try that on any future large-scale stencil projects.
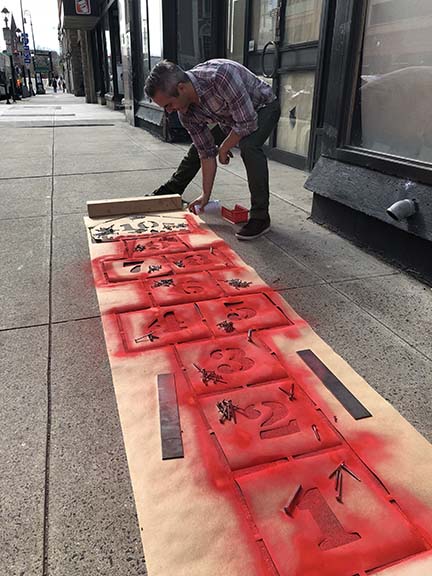
Ben and I sprayed the project using a Montana brand marking chalk spray from Artist & Craftsman. I've been really surprised by its longevity -- several weeks, a number of rainstorms, and a lot of foot traffic later, and the boards are still clearly visible on the sidewalk. As you can see from the photos, we weighted the stencil down with an assortment of random scrap metal and bolts/screws from the space. The chalk dries super fast, but definitely left far more residue than I anticipated.