Etch a custon design on a glass (or any glass) using Armour Etch and a removeable vinyl stencil.

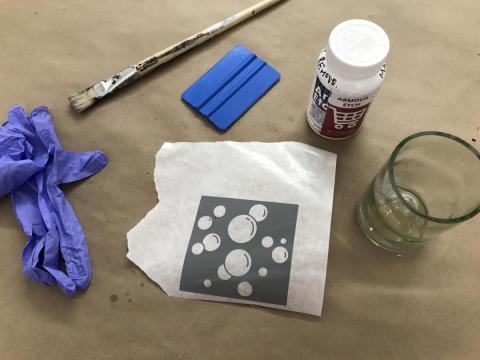
For this project you will need:
\r\n
- \r\n
- A glass
- A cut & weeded vinyl stencil on transfer tape
- Blue vinyl application squeegee
- Armour Etch (available for purchase at MakeHaven store; kept in drawers by vinyl cutter)
- Rubber gloves *VERY IMPORTANT! Armour etch must NOT come into contact with skin*
- Disposable brush (probably even less fancy than the one shown here--see the one used in later photos. Foam brushes don't work great for details, but a cheap bristle brush is great)
\r\n
\r\n
\r\n
\r\n
\r\n
\r\n
\r\n
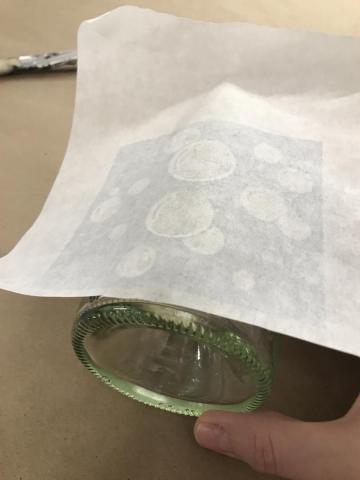
Apply the stencil to the glass. This works best by tacking the center, then using the squeegee moving smoothly from the center out to smooth down the sides. Note that the more curvature the glass has, the more distortion may occur. A more flat surface results in a cleaner image.
\r\n
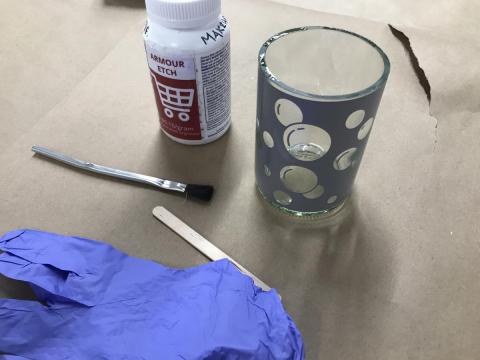
When you area ready to etch, you will need:
\r\n
- \r\n
- disposable rubber gloves
- your glass with stencil
- disposable paint brush
- craft stick
- Armour Etch
- a piece of craft paper the size of your work area
\r\n
\r\n
\r\n
\r\n
\r\n
\r\n
\r\n
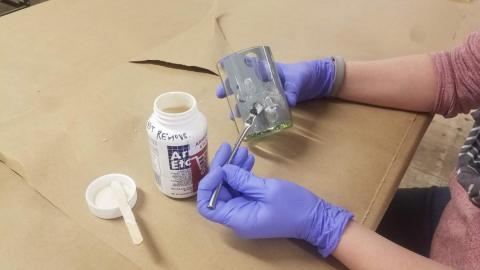
It is VERY IMPORTANT that you are careful with Armour Etch (read warnings). Before handling, put on rubber gloves! Put down a fresh piece of craft paper in the size of your workspace, so you can clean up everything easily and completely at the end.
\r\n
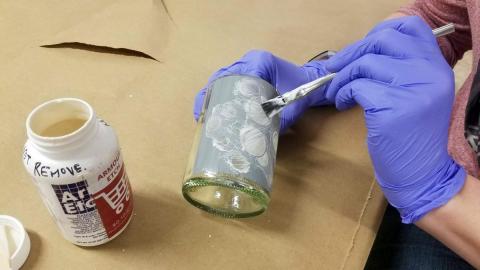
While wearing gloves and with the cap on, shake the Armour Etch to mix it. After opening, give the contents a few stirs with a craft stick to ensure it is well mixed. Then begin applying the compound to the parts of the glass you want etched. Cover all areas completely. Wait three minutes. Keep the gloves on during this time.
\r\n
Note: this is a great "Hey Siri" moment if using your phone as a timer. You don't want to be using a phone with your Armour Etch gloves unless you plan to etch your phone glass!
\r\n
After 3 minutes, go over the etched areas with your brush. You can did the brush into the etch for a little more, but the idea isn't too apply a second coat as much as it is to move the compound around to be sure there aren't air bubbles or missed areas. A good idea is to go over all areas in the opposite direction of your initial brush strokes.
\r\n
\r\n
Wait 3 minutes after completing this step, then repeat one more time, again going against the grain of your brush strokes. Wait three final minutes.
\r\n
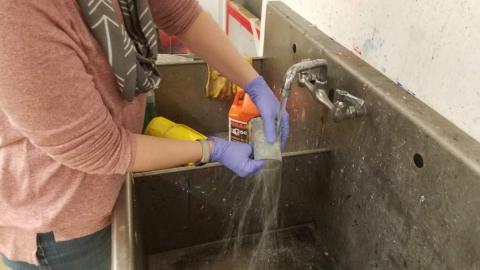
WIth your gloves still on, bring your piece to the slop sink and rinse thoroughly with warm water. (Warm water will just make the vinyl easier to peel off). Don't panic when it looks like there is no etching there. It is hard to see when wet. Just remove all the compound and then remove the vinyl.
\r\n
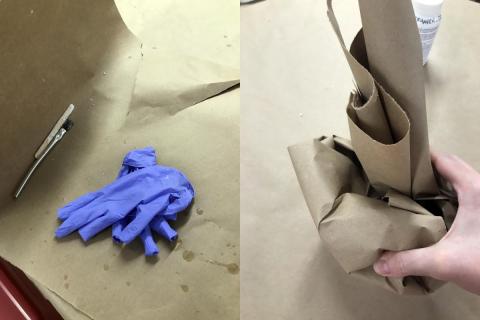
With your gloves STILL on: set your glass down to dry. Cap the Armour Etch and return it to the drawer. Take off your gloves carefully (inside out) and leave them on the center of the craft paper with the used brush and craft stick. Wrap up the supplies using the edges of the apper to avoid contact. Trash these used materials.
\r\n
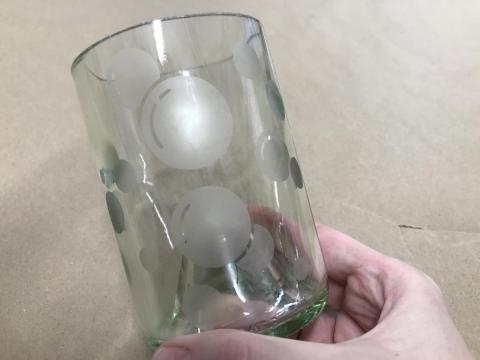
And you're good. What a nice glass you made.
\r\n