This is a fast, simple sewn facemask that includes a nose piece. It is designed for use with the 9" x 6" mask kits, but you can also cut material to 9"x6". This pattern also works at 9.5"x7" for a larger mask. I was able to create a mask in about 10 minutes, and that's with some 7th grade home-ec training and a badging on a sewing machine at MakeHaven. This is written by a novice sewist for novices. You can do this!

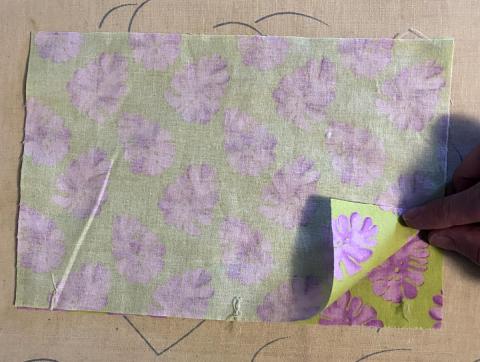
Put the two rectangles of 9" x 6" fabric with the long sides along the bottom. Place the material with the right sides together (wrong sides facing out).
\r\n
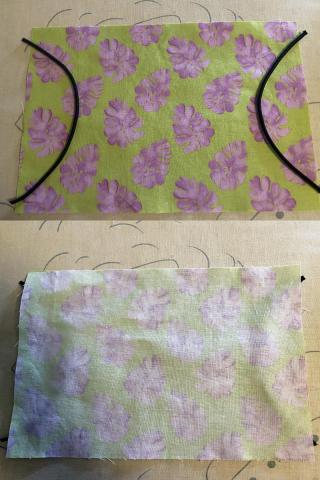
Sandwich two "C"'s of elastic between the layers as shown. Each elastic should be about 7" long (some kits have strands of 14" -- cut these in half to make two, yay math!) Keep a little bit of elastic sticking out so it is easier to catch in the seam.
\r\n
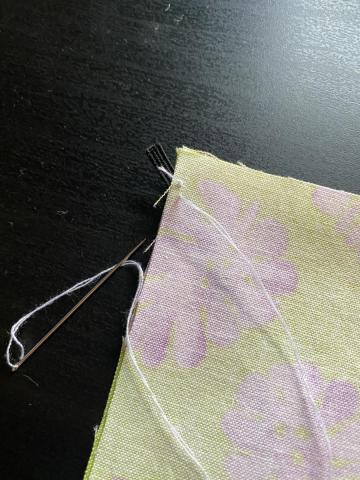
This is optional but I found it helpful, especially when dealing with rolly cord elastic. Use a needle and thread and put in a couple of stitches to hold the elastic in place. You can also pin it or if you are good, just hold it. But for me, it was worth doing a couple stitches to tack it in place. If you have thin cord, tying a knot at the end can help.
\r\n
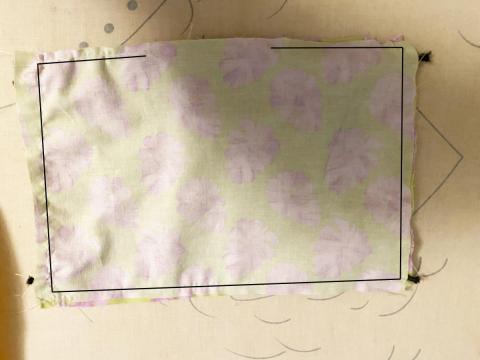
Sew around the edges of the piece. Be sure to backstitch to prevent unraveling, and to help secure the elastic at the corners. Leave about 3" open at the top so you can turn the piece inside out. Clipping the excess material on the corners will help create a smoother fit. The seams were hard to see so I have shown them in black in the image.
\r\n
Turn the piece inside out: reach into the 3" gap and grab the elastic/ties and pull, to make turning the mask right-side out go faster. (Plus you've just QC'ed them at the same time. Sometimes the thin elastic cord is a hard to attach.)
\r\n
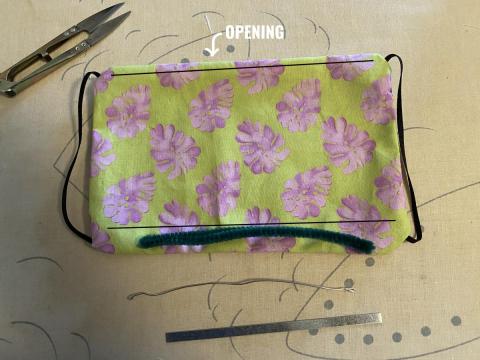
You now have a pocket with the ear elastic attached. Put the nose bridge piece at the bottom of the mask as shown (this will eventually become the top). You can use a number of materials to create the nose bridge. A few examples are shown: a pipe cleaner (if it is thin you can fold in half for more support), a thin piece of metal, jewelery wire. Nom-rusting metal seems to create the best and most lasting fit. Whatever you use, be sure the ends are smooth (you can round out with sandpaper or a nail file) and/or turned in so they don't tear the mask.
\r\n
\r\n
Bring the piece into the bottom center of the mask, then sew a seam along the top and bottom as shown with the black lines. One will close the pocket, the other will enclose the nose bridge piece (pipe cleaner, metal, etc.).
\r\n
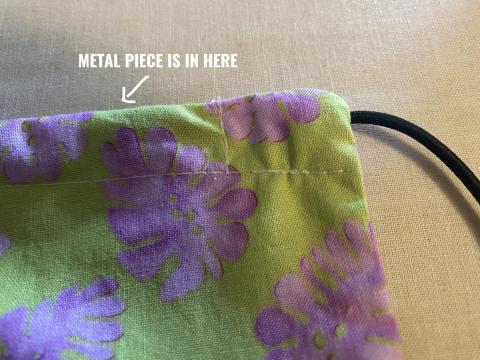
This isn't critical, but I think it's worth the few stitches assuming your nose piece does not go the full length of the mask. Center the nose bridge piece is the mask, then sew a short seam to the left and right of it to keep it from shifting the length of the mask.
\r\n
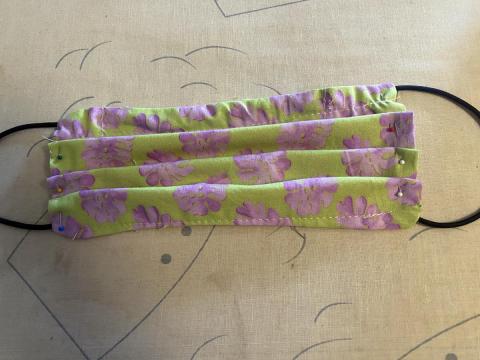
Fold the mask up and back three times to create 3 pleats. Best practice suggests to make the pleats downward-facing to avoid trapping dust/droplets. Make sure the pleats are generally even and run across the full length of the mask. I find it helpful to pin and/or press the pleats in place before sewing. Remember to remove your pins before you sew. Once you have them in place, sew a seam along each side to secure the pleats.
\r\n
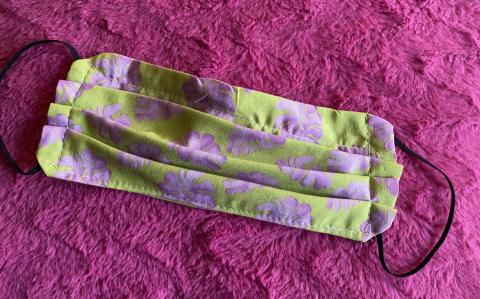
And you've done it! Just trim any loose threads, wash the mask in hot water and it is ready to donate or use.
\r\n