Easy Zippered Bag. Pictured here is what I call a cosmetic bag but this can be any size or shape you want. For example: pencil case, phone case, computer case, tablet case, etc. The size of this cosmetic bag finished is 7" wide and 6" long with curved edges.
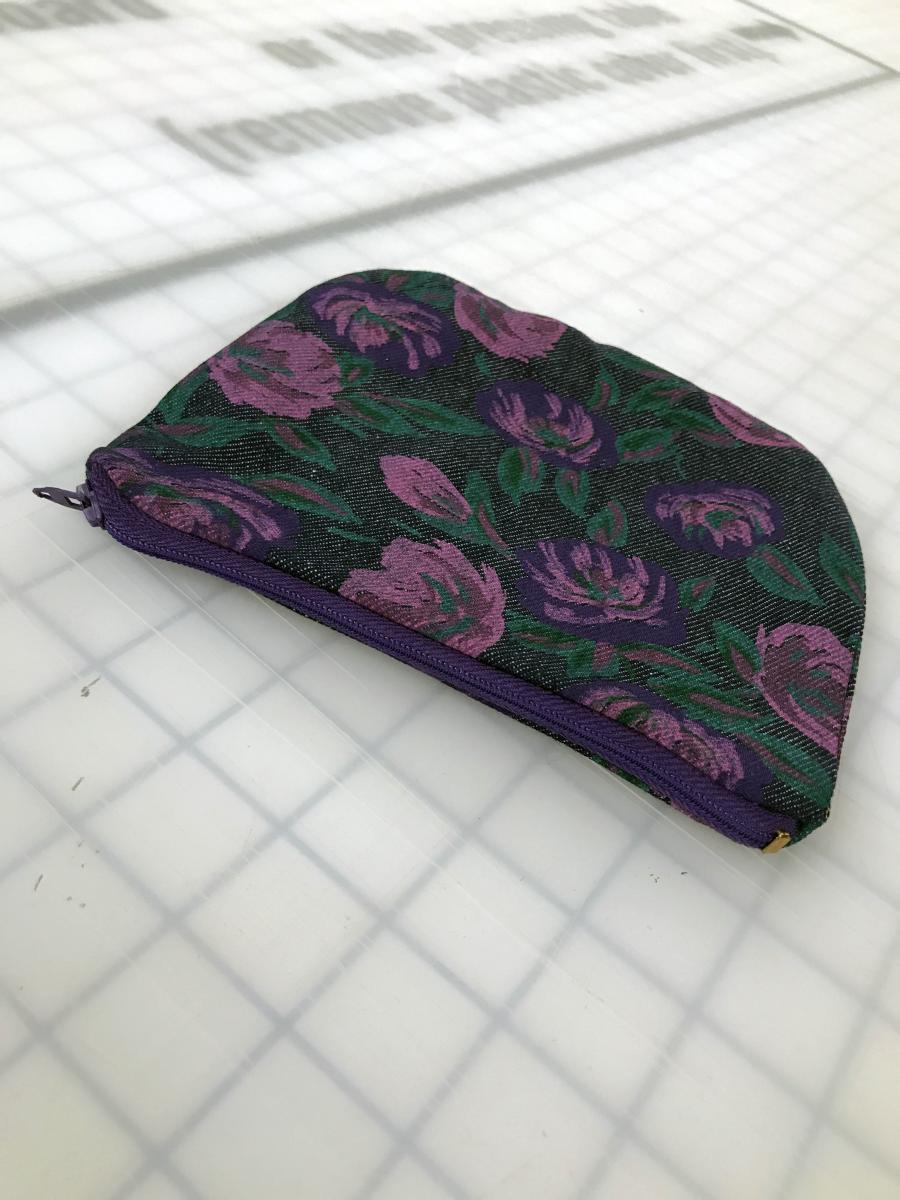
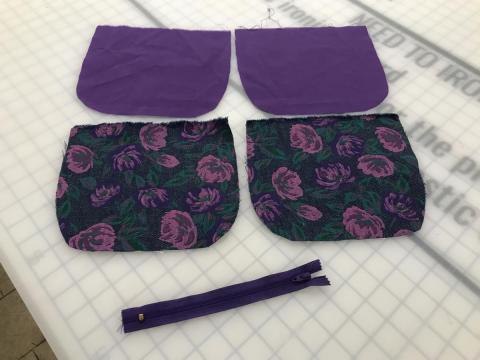
You will need two pieces of fabric for the outside (in this example floral pattern), two pieces of lining fabric (in this example purple solid), a regular zipper (not invisible zipper--in example I've used a 7" zipper) and of course your thread and bobbin for the sewing machine.
\r\n
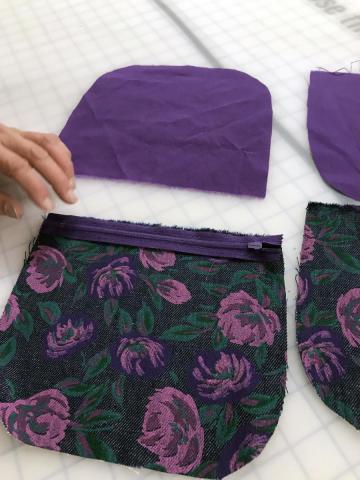
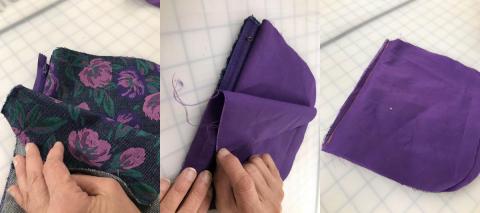
Place the outer fabric face up with the zipper face down on top of it as shown.
\r\n
Place the lining fabric on top of the zipper as shown
\r\n

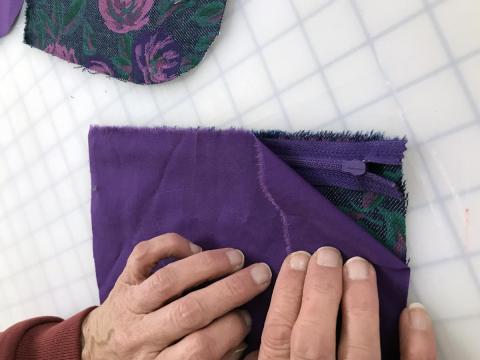
Sew these 3 pieces together. The example shows a contrasting orange thread for visibility, but you will probably want a complimentary color that better matches your fabric. The photo collage shows the final seam from all sides.
\r\n
Now repeat the earlier steps for the opposite side of the bag. Remember to keep the right side of the fabric to the right side of the zipper (right vs. wrong side, NOT right/left) just as in previous steps. Line up all 3 pieces and sew.
\r\n
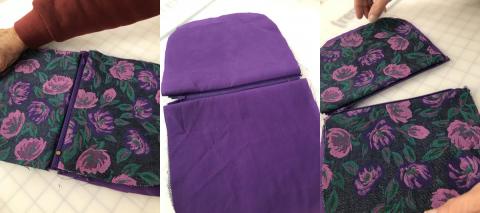
Your piece should now look like the picture to the right -- excellent! Before you continue, OPEN THE ZIPPER as you see in the last photo. This is really important.
\r\n
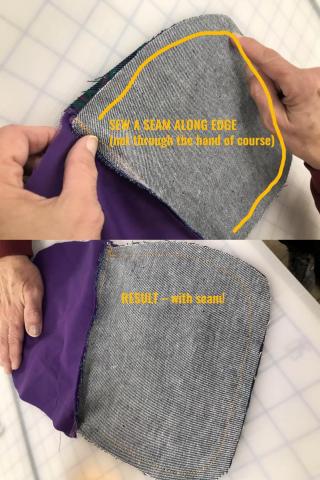
Now that the zipper is in place you are ready to assemble the main fabric body of the bag. Be sure the right sides are facing each other. Sew a seam along the edge as close as you can. Be careful not to catch the zipper as you go.
\r\n
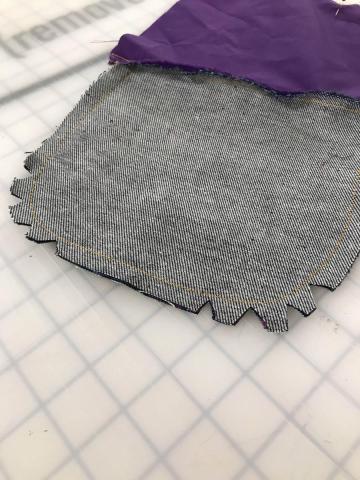
Depending on your desired shape, you probably want to cut small triangle shapes around the corners as shown. This will keep the fabric from bunching when you turn it inside out.
\r\n
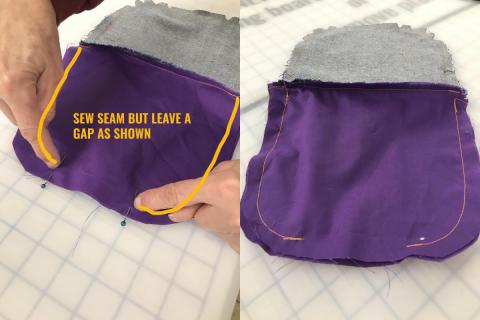
Sew the seam in the lining, but be sure to leave a gap (in this case 3") as shown so you can turn it right side out.
\r\n
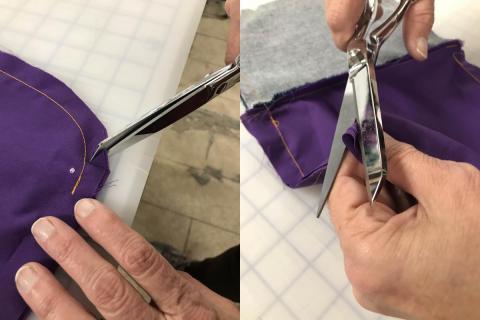
Now cut the corners of the lining fabric as you did for the outside -- see the photo collage for some techniques.
\r\n
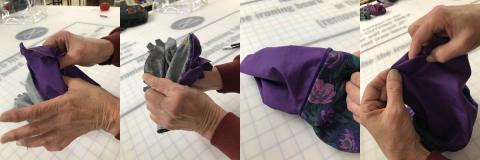
Pull the bag through the opening in the lining.
\r\n
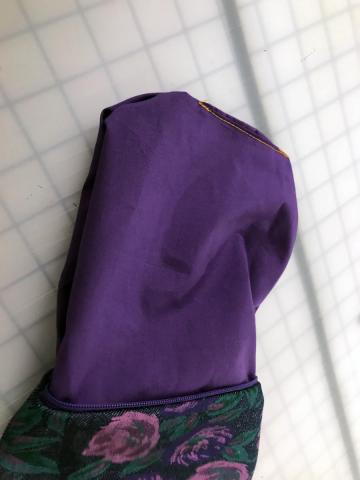
Once the bag is right side out, sew up the opening in the lining by machine or hand.
\r\n

Nicely done.
\r\n