
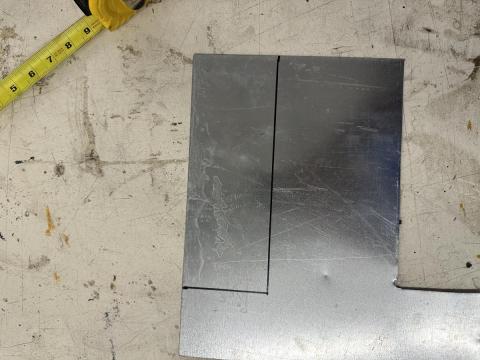
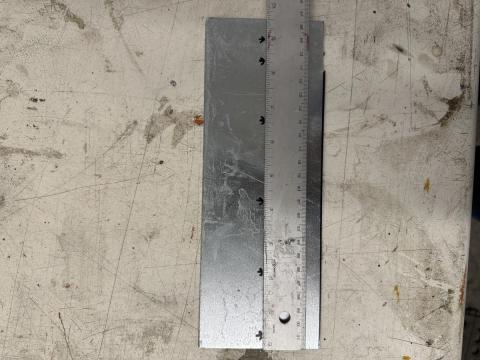
Your first step should be to grab a decent-sized sheet of metal that is either aluminum or stainless steel that is the proper gauge for the machine (remember the sheer can only take a maximum of 20 gauge steel and 16 gauge aluminum). Once you have the piece, mark out with a marker (or screwdriver) a 9 1/2\" by 3 1/2\" rectangle.
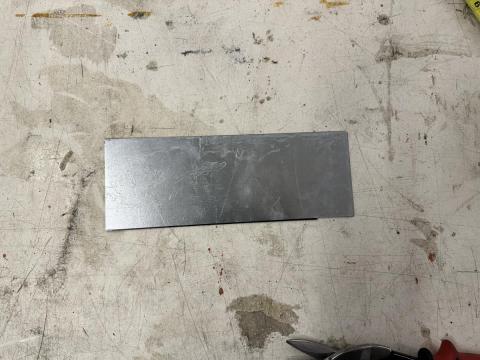
For this step, you will need to use the shears to cut the rectangle from the rest of the metal. Take a line that you marked and like it up right under the blade and press down firmly on the handle to make sure it slices all the way through the metal, do this for all sides you need to cut out. You should be left with a rectangle that looks like this
Measure out lines along the rectangle at 1/2\", 2 1/8\", 4 1/2\", 6 5/8\", 8 3/8\", and 9\". Mark them with a marker or screwdriver, these will be the lines along which the stands will be folded.
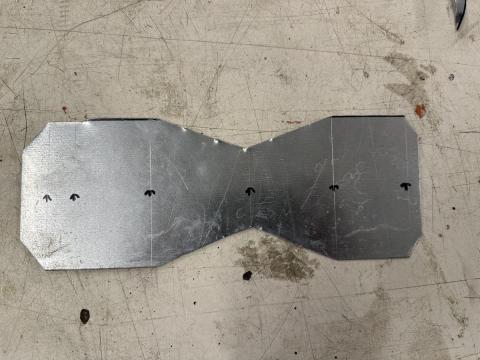
At the 4 1/2\" line make a mark 3/4\" from the edge on both sides, then mark a line from the edge of the 2 1/8\" and 6 5/8\" lines and use hand-heald shears to cut the marked triangle out. Also, mark and cut out lines at a 45-degree angle from each corner to the first marked line.
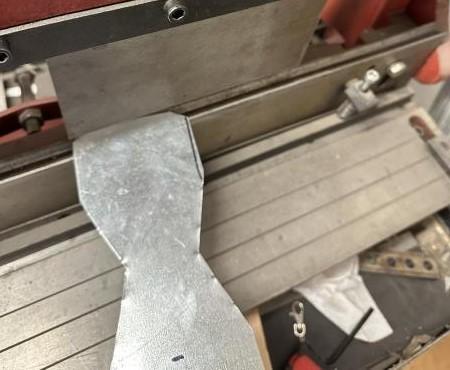
It\'s time to bend! Head over to the break and the first bend should be on the side where you measured 1/2\" from the edge (hint: It\'s the side without two lines close to each other). Bend that angle at about 45 degrees by not pressing the break all the way to the bottom. Then go to the other side and bend each of the other two lines at 45 degrees. Lastly, flip it over and bend the thin line at a greater-than-90-degree angle
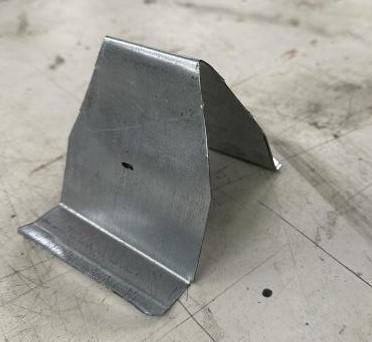
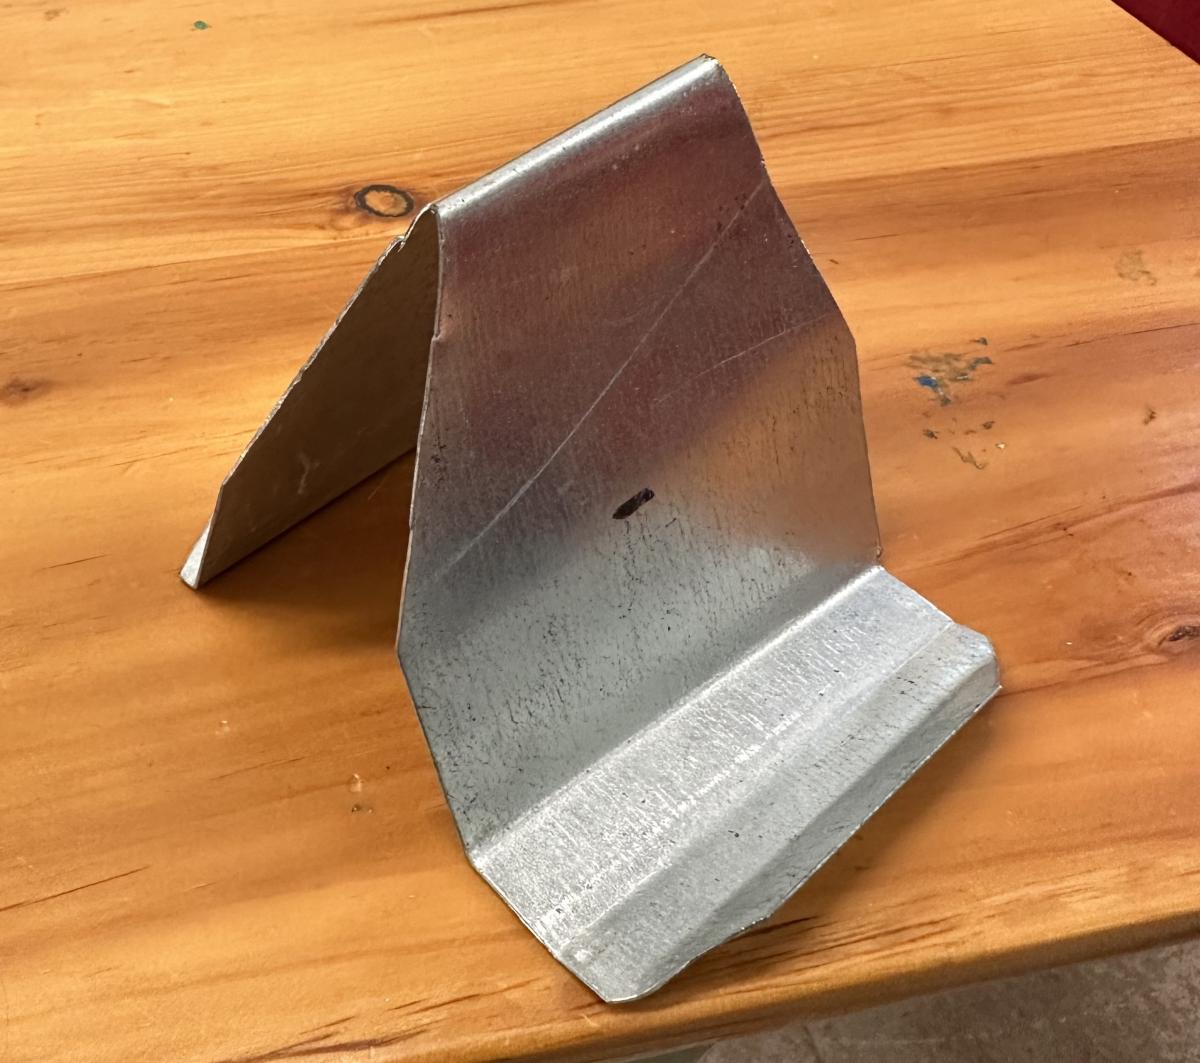
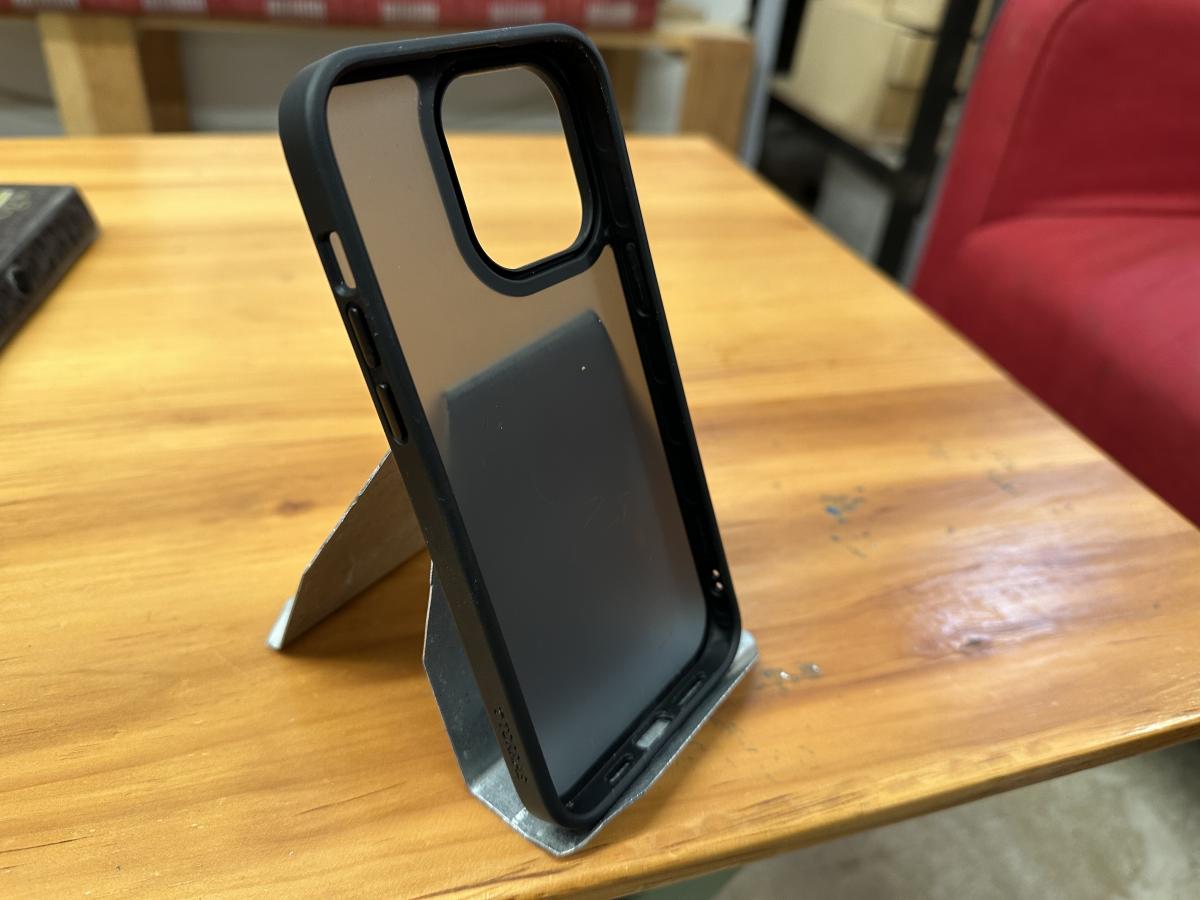
Congrats! Your finished product should look something like this, make sure to get a file to smooth out the rough edges, and feel free to decorate it however you like from this point. Or just leave it if you like how this looks!