Associated tools

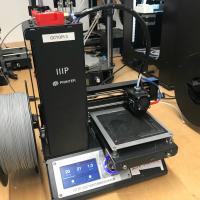
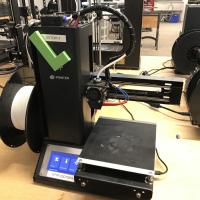
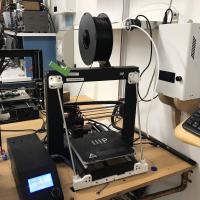
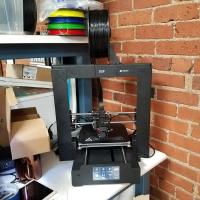


Prusa 3D Printers Badge
Completing this badge allows you to use the Prusa 3D printers. Additional training is required for use of the Markforged and Form Labs 3D printers.
Badge Checkout Requirement
In person checkout required
Badge Checklist
Complete these items to earn the badge.
- 3D Printer (Generic FDM)
- Video watched, quiz taken, any questions?
- Identify and describe control axes, changing filament, and cleaning print surface
- Cleaning the bed (for the first print of the day)
- Putty knife to scrape away chunks
- Lightly sand with sandpaper (grit #)
- Paper towel with isopropyl
- Changing filament
- Pre-heat machine (215)
- Cut filament near spool (at angle)
- Remove old spool - keep slight tension on filament!
- Filament end should be secured on spool itself, inserted into the printer, or held in your hand - loose filament WILL tangle!
- Remove old filament from extruder,
- Move tension spring lever on top and pull filament from extruder motor
- Adding new filament (only PLA)
- Select desired color from available filaments
- If a new roll is opened, write down the color on the To Purchase Clipboard
- Feed new filament through extruder/tube until desired color is extruded
- On Minis, tension lever must be depressed
- Printing from Octopi
- Go to http://octopi#.makehaven, where # is the number printer you’re using (each printer is labeled on the front)
- If printer state is Offline
- Click the grey Connect button, printer should now say “State: Operational”
- On the lower left hand side are the Folders and Files, create a folder with your name, then upload said folder
- Click the Upload button at the bottom
- Select your STL file, which will load into slicer automatically
- Using the slicer controls: Rotate, scale, remove, duplicate
- After orienting model in slicer, go to General tab
- Change to “After Slicing: Select for Printing”
- On Basic tab:
- Change “Fill Density” to desired percentage (suggested value of 15%)
- Change “Support Type” if supports are required
- Build plate: only supports where model is over buildplate
- Everywhere: adds supports anywhere where there is a 45° or greater overhang
- Make sure extruder temp is 215 degrees and bed is 60
- On Advanced tab:
- Change adhesion from “None” to “Brim” as default, and to “Raft” only if you’re having adhesion problems
- Click “Slice”
- On left side click blue Print button
- Print Process
- Keep note of “Filament (tool 0)”; each member is allocated 30 meters per day. If your prints exceed this, please pay $0.10 per meter at makehaven.org/store, or in the cash box on the wall near the 3D printers
- Put a Name and Date Label (printed from the label machine) on the printer so another user can put your print on the Finished Shelf with this label, or so that if the print fails another user can tell you on Slack
- Removing the print: use a putty knife with the beveled side up at a very shallow angle, to avoid gouging the print surface. Prints are easier to remove once the bed has cooled below 50°C
- If you experience problems that you cannot fix while printing, replace the green check mark with a red X. If able, leave a note on the whiteboard of the problem, and post on Slack
- Cleaning up tool
- Please make sure any bits of filament are thrown in the trash
- Feel free to talk about the following:
- Bed levelling
- Clearing clogged nozzles

Badge
Friday, September 26, 2025 - 9:36pm
Luis
Pacheco
Member profiles
Badge
Sunday, September 14, 2025 - 11:28am
Chris
Crowl
Member profiles
Badge
Thursday, September 11, 2025 - 10:03pm
Suleiman
Barakat
Member profiles
Badge
Wednesday, September 10, 2025 - 9:58pm
Pronouns
He / Him
Preston
Dennett
Member profiles
Badge
Wednesday, September 10, 2025 - 2:11pm
Pronouns
He/Him
Nick
Latella
Member profiles
Badge
Tuesday, September 2, 2025 - 7:28pm
Aaron
Lebel
Member profiles
Badge
Wednesday, August 27, 2025 - 7:54am
Pronouns
He/him
Cullen
Ross
Member profiles
Badge
Monday, August 18, 2025 - 5:19pm
Pronouns
He/his
Emile
Bouriez
Member profiles
Badge
Monday, August 18, 2025 - 3:05pm
Pronouns
she/her
Erin
Murphy
Member profiles
Badge
Wednesday, August 13, 2025 - 7:11pm
Pronouns
He/They
Max
Wibert
Member profiles
Badge
Friday, August 8, 2025 - 6:54pm
Pronouns
He/Him
Andrew
Dows
Member profiles
Badge
Friday, August 8, 2025 - 10:14am
Pronouns
They/them
Meredith
Clark
Member profiles
Badge
Thursday, August 7, 2025 - 8:41pm
Pronouns
She/Her
Shana
Salem
Member profiles
Badge
Monday, August 4, 2025 - 5:23pm
Pronouns
She/her
Kadesha
Burgan
Member profiles
Badge
Thursday, July 31, 2025 - 1:02pm
Pronouns
he/him
Joseph
Baez
Member profiles
Badge
Tuesday, July 29, 2025 - 11:45am
Pronouns
she/her
Quinn
Moroz
Member profiles
Badge
Thursday, July 24, 2025 - 8:16pm
Pronouns
He/Him/His
Samuel
Phillips
Member profiles
Badge
Thursday, July 24, 2025 - 7:52pm
Pronouns
he/him
Diego Nicolas
Amerio
Member profiles
Badge
Wednesday, July 16, 2025 - 1:16pm
Eric
White
Member profiles
Badge
Friday, June 20, 2025 - 9:36am
Pronouns
They/Them
Sam
Stoddard
Member profiles
Badge
Thursday, June 12, 2025 - 9:09pm
Pronouns
He/Him
Andrew
Tekel
Member profiles
Badge
Friday, June 6, 2025 - 9:06pm
Pronouns
she/her
Amanda
Kelly
Member profiles
Badge
Thursday, May 29, 2025 - 4:36pm
Pronouns
He/Him
Sam
Brege
Member profiles
Badge
Sunday, May 18, 2025 - 12:44pm
Boris
Paraliticci
Member profiles
Badge
Wednesday, May 14, 2025 - 9:24pm
Cecelia
Allison
Member profiles
Badge
Wednesday, May 14, 2025 - 6:37pm
Pronouns
He
Edwin
Sun
Member profiles
Badge
Thursday, May 1, 2025 - 7:48pm
Pronouns
he/him
John
Lickteig
Member profiles
Badge
Thursday, May 1, 2025 - 6:40pm
Rachid
Boukrim
Member profiles
Badge
Monday, April 21, 2025 - 3:18pm
Eric
Flynn
Member profiles
Badge
Thursday, April 17, 2025 - 8:48pm
Bob
McGonigle
Member profiles
Badge
Thursday, April 17, 2025 - 3:26pm
Pronouns
@#$
Jim
Squiciari
Member profiles
Badge
Thursday, April 17, 2025 - 11:23am
Pronouns
she/they
Katy
Mulvaney
Member profiles