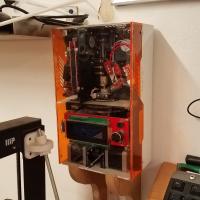
Associated tools


Prusa 3D Printers Badge
Completing this badge allows you to use the Prusa 3D printers. Additional training is required for use of the Markforged and Form Labs 3D printers.
Badge Checkout Requirement
In person checkout required
Badge Checklist
Complete these items to earn the badge.
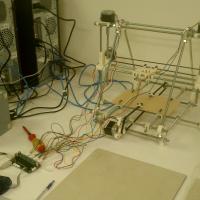
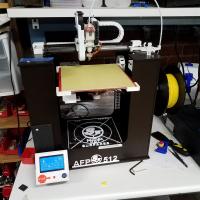
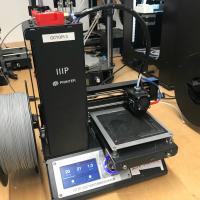
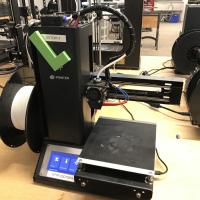
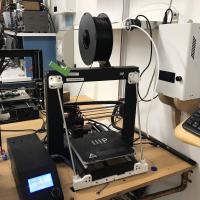
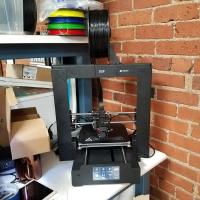
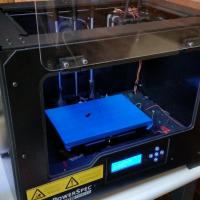
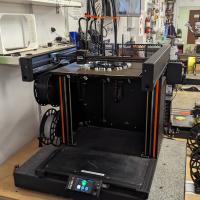
- 3D Printer (Generic FDM)
- Video watched, quiz taken, any questions?
- Identify and describe control axes, changing filament, and cleaning print surface
- Cleaning the bed (for the first print of the day)
- Putty knife to scrape away chunks
- Lightly sand with sandpaper (grit #)
- Paper towel with isopropyl
- Changing filament
- Pre-heat machine (215)
- Cut filament near spool (at angle)
- Remove old spool - keep slight tension on filament!
- Filament end should be secured on spool itself, inserted into the printer, or held in your hand - loose filament WILL tangle!
- Remove old filament from extruder,
- Move tension spring lever on top and pull filament from extruder motor
- Adding new filament (only PLA)
- Select desired color from available filaments
- If a new roll is opened, write down the color on the To Purchase Clipboard
- Feed new filament through extruder/tube until desired color is extruded
- On Minis, tension lever must be depressed
- Printing from Octopi
- Go to http://octopi#.makehaven, where # is the number printer you’re using (each printer is labeled on the front)
- If printer state is Offline
- Click the grey Connect button, printer should now say “State: Operational”
- On the lower left hand side are the Folders and Files, create a folder with your name, then upload said folder
- Click the Upload button at the bottom
- Select your STL file, which will load into slicer automatically
- Using the slicer controls: Rotate, scale, remove, duplicate
- After orienting model in slicer, go to General tab
- Change to “After Slicing: Select for Printing”
- On Basic tab:
- Change “Fill Density” to desired percentage (suggested value of 15%)
- Change “Support Type” if supports are required
- Build plate: only supports where model is over buildplate
- Everywhere: adds supports anywhere where there is a 45° or greater overhang
- Make sure extruder temp is 215 degrees and bed is 60
- On Advanced tab:
- Change adhesion from “None” to “Brim” as default, and to “Raft” only if you’re having adhesion problems
- Click “Slice”
- On left side click blue Print button
- Print Process
- Keep note of “Filament (tool 0)”; each member is allocated 30 meters per day. If your prints exceed this, please pay $0.10 per meter at makehaven.org/store, or in the cash box on the wall near the 3D printers
- Put a Name and Date Label (printed from the label machine) on the printer so another user can put your print on the Finished Shelf with this label, or so that if the print fails another user can tell you on Slack
- Removing the print: use a putty knife with the beveled side up at a very shallow angle, to avoid gouging the print surface. Prints are easier to remove once the bed has cooled below 50°C
- If you experience problems that you cannot fix while printing, replace the green check mark with a red X. If able, leave a note on the whiteboard of the problem, and post on Slack
- Cleaning up tool
- Please make sure any bits of filament are thrown in the trash
- Feel free to talk about the following:
- Bed levelling
- Clearing clogged nozzles

Badge
Saturday, April 30, 2022 - 8:31pm
Aslan
Taheri
Member profiles
Badge
Sunday, April 24, 2022 - 6:15pm
Maike
Fillmer
Member profiles
Badge
Thursday, April 21, 2022 - 6:55am
Larisa
Oldmixon-Berson
Member profiles
Badge
Wednesday, April 20, 2022 - 12:49pm
Pronouns
he/him
Russell
Weeks
Member profiles
Badge
Saturday, April 9, 2022 - 10:16am
David
VanOsdol
Member profiles
Badge
Saturday, April 9, 2022 - 8:37am
Sreeram
Koneru
Member profiles
Badge
Tuesday, March 29, 2022 - 2:03pm
Pronouns
She/Her
Zohra
Rawling
Member profiles
Badge
Friday, March 25, 2022 - 4:07pm
Pronouns
He/him
Nathan
Rawling
Member profiles
Badge
Tuesday, March 15, 2022 - 9:57pm
Pronouns
She/her/hers
Dorothy
Tolchin
Member profiles
Badge
Tuesday, March 15, 2022 - 9:52pm
Pronouns
He/him/his
Ben
Tolchin
Member profiles
Badge
Monday, March 14, 2022 - 5:17pm
Pronouns
She/her
Geena
Fram
Member profiles
Badge
Thursday, March 10, 2022 - 3:55pm
Pronouns
She/Her
Alix
Pauchet
Member profiles
Badge
Tuesday, March 8, 2022 - 10:45pm
Peter
Clarke
Member profiles
Badge
Wednesday, February 23, 2022 - 11:13pm
Pronouns
She/her
Chelsea
Rowe
Member profiles
Badge
Monday, February 21, 2022 - 12:24pm
Giorgio
Mottola
Member profiles
Badge
Wednesday, February 16, 2022 - 2:47pm
Alessandro
Maione
Member profiles
Badge
Friday, February 4, 2022 - 8:36am
Pronouns
He/Him
Joey
Swerdlin
Member profiles
Badge
Monday, January 31, 2022 - 5:53pm
Aidan
Curtin
Member profiles
Badge
Tuesday, January 11, 2022 - 1:07pm
Austin
Larkin
Member profiles
Badge
Sunday, January 9, 2022 - 4:33pm
Louis
Thibault
Member profiles
Badge
Tuesday, December 21, 2021 - 6:55pm
Pronouns
She/Her/Hers
Young
Le
Member profiles
Badge
Sunday, December 19, 2021 - 1:51pm
Alena
Higgins
Member profiles
Badge
Tuesday, December 14, 2021 - 6:51pm
James
Flewellyn
Member profiles
Badge
Monday, November 22, 2021 - 10:29am
Pronouns
He/Him
Christopher
Chalsma
Member profiles
Badge
Saturday, November 13, 2021 - 6:58am
Eric
Kotowski
Member profiles
Badge
Friday, November 12, 2021 - 3:18pm
Evan
Haglund
Member profiles
Badge
Tuesday, October 26, 2021 - 8:44am
Kirsten
Zinser
Member profiles
Badge
Sunday, October 3, 2021 - 8:33am
Norman
Fleming
Member profiles
Badge
Tuesday, September 7, 2021 - 7:08pm
Vincent
Chov
Member profiles
Badge
Tuesday, September 7, 2021 - 1:17pm
Matt
McGuirk
Member profiles
Badge
Thursday, September 2, 2021 - 8:02pm
Pooja
Shah
Member profiles
Badge
Tuesday, August 31, 2021 - 4:52pm
Matt
Wellins
Member profiles